Showing posts with label thrifted. Show all posts

Friday, April 25, 2014

A matching set (for the young man on the go)


One day at Goodwill, Django reaches out and grabs this insanely blue corduroy printed with red, green, white, and yellow dogs.  I would never have bought it, because even a pre-schooler would be embarassed to be seen in that, right?  Apparently wrong.  Very wrong.  He insisted that we buy it, so home it came.


The fabric was in great condition, fortunately.  When buying corduroy at Goodwill, be sure to open it up and take a look.  The pile gets smooshed sometimes, especially when they use those crazy pants hangers with the locking bar.  It ends up leaving big lines where the pile is just crushed and it's super visible.  You don't want none of that.  But this fabric was mostly fine and there was plenty of it.


These are (surprise) the Little Heartbreaker Pants from Sewing for Boys.  Again.  IDGAF they're awesome.  I would never dress my son in skinnies so this is really the only pants pattern I need for him.  And, as always, such a great pattern.  He's kind of between the 4/5 and 6/7 sizes right now.  I can't remember if these are 6/7 or if they're lengthened 4/5s.  He's got some of both in his wardrobe right now.  


He can be such a little ham for the camera sometimes.  When he's not running away trying to foil my evil plot to take pictures of him to post on the internet, of course.  As you can see, these pants have seen a lot of wear: the zoo, the playground, school, you name it.  No shame, this kid.  I hope he stays that way.


This is just about the only close up I have of this fabric.  It's even worse than you thought, isn't it?  I had sooo much left after making him pants (and really, what boy needs more than one pair of brightly colored dog pants?) I made him a backpack.  Oh. My. God.  It's just too much isn't it?  That's ok, I don't have any pictures of him wearing both at the same time.  Because that is too much.  At least for me.  I don't think I could handle that much.


I used the Toddler Backpack pattern from Made by Rae.  This was actually a Christmas present so it's been a long time since construction.  I seem to recall that it came together with no problems, though.  I really like the size of this backpack.  All the kid backpacks I've seen in stores are huge for him!  Although he's growing so fast, I definitely think he'll need a bigger one for kindergarten (yikes! I still can't believe that's coming up so soon).  


I lined it with some more of the fish sheet.  That thing just keeps going.  It's become a Henry shirt, one or two pairs of boxers, a number of quilt squares in a few different quilts, and there's still more!  Inserting the lining wasn't nearly as difficult as i expected; the instructions are very clear and the technique is a cinch.  I think I even got it on the first try!


You can see it here filled with lots of Christmas schwag.  I did add a pouch with elastic at the top for his water bottle, which was also a Christmas present.  The straps were made with Kona cotton, the piping I bought pre-made because I'm lazy, and the straps are that stuff they use for bag straps.  The pattern calls for it, but I forget what it's called.  Ahh, there it is: nylon strap, often called "webbing."  


The Boy is already growing out of this backpack, but hopefully his lil' sis won't be opposed to inheriting it.  

Monday, March 17, 2014

Completed: Orange-You-Glad Button Up

The full name has to be the "orange you glad it's not another pair of Thurlows" button up shirt.  Not that you're really happy that it's not another pair of Thurlows because, honestly, how could you ever get tired of the genius that is the Thurlow pattern.  Moving on, though.

I've been exceedingly jealous of all the lovely Archer shirts popping up all over the place... unfortunately the cut of the pattern is just not my style.  I need a slightly more fitted (or perhaps shapely is the word) button up.  Boxy clothes make me look, well, really boxy.  No bueno.


The ratio of handmade bottoms to tops in my wardrobe is beginning to spiral out of control.  The sad truth is that it isn't the result of an excess of serviceable RTW, but rather of finding and falling in love with the Thurlow and Hollyburn patterns.  The problem with tops is that I just can't find a pattern that I like.  I tried modifying the Darling Ranges dress to be a top, but honestly it's just so low cut and raising the neckline is tricky.  Then I tried some godawful big 5 pattern and you never saw the result (for very good reason).  I seem to recall a Seinfeld episode featuring that pattern...  Can anybody guess which one?

I think the real crux of the matter is that I have an impossible time finding button up shirts that I like.  In my entire life I have found two that I liked.  One was a white button up with 3/4 sleeves from Van Heusen (come to think of it, where the hell did that shirt go anyway?) and the other is a black long sleeve button up from Express.  Since, obviously, the Van Heusen top is long gone, I used the black Express top for inspiration.


I bought Pattern Making for a Perfect Fit aaaages ago.  Before I even knew much about sewing, to be perfectly honest.   I thought it was a really cool idea, and it is... but there was just so much in the book that was beyond my realm of knowledge.  Seam finishes?  Interfacing?  What da whaaa?  Of course that was a long time ago and when I picked the book back up (specifically for this project) it all made a lot more sense.  I've got a lot more techniques under my belt and have even tackled a placket or two.

 I don't have the same set up (nor am I prepared either spatially or financially to set up) for pattern tracing.  Instead I laid down my big roll poly tracing stuff (sorry to get all technical on ya there) on an overstuffed ottoman, laid the shirt on top of that, pinned, and sort of traced around the pieces one at a time.  It worked out pretty well.  Then, of course, I had to go in and add seam allowances.


The construction of this shirt is interesting.  Each front is made of three pieces: a yoke, a center front piece, and a side front piece.  The back also has a yoke, a center back piece cut on the fold, and side back pieces.  It's like partial princess seams and I think it works really well to give the shirt shaping without the harsh look sometimes afforded by darts (not to mention awkward dart pointage, ewww).  The original shirt had pockets covering up the point where the three front pieces meet, but I didn't bother with this version as it's a "wearable muslin" if you will.


I did have a few minor problems.  I need to lower and wide the full bust about a half inch... other than that I had a little trouble with the hem. Mostly just the center back.


That just might not steam out.  It actually borders on a high/low hem in real life.  The shirt looks great tucked in, though, so I'm not too worried.  I will raise the center hem just a smidge on my next version though.  The original version has this same shape of hem, I just traced it off.  All the curves made it surprisingly difficult to actually hem.  I think that might be part of the back problem you see here.  It's just too much fabric being sewn to too little.

The single biggest problem i had with the shirt is almost too embarrassing to share, but what the hell, here it goes.  I flatfelled every single seam in the body... only to sew the sleeves on inside out.  When I realized my mistake I just didn't have the heart to rip them off. Besides, the collar seems to sit better inside out so I just zigzagged the seam and left it that way.  As a result, though this is what my seams look like.


Le sigh... So close.  This is one of those strange little details, though, that I daresay no one is likely to notice.  Design feature?  I originally thought the inspiration shirt had flatfelled seams, only to find upon closer inspection that the seams were actually serged and then topstitched down to look like of like flatfelled seams.  Which means, really, this is closer to what the original shirt looks like.  Still... just no.  I may have also had a little accident when i was opening up the buttonholes...


Yikes!  It's Frankenshirt!  Oh well, at least it'll always be hidden under a button.  You can see how awful the stitching on the placket looks, but again: that was supposed to be inside!


Still, with all it's foibles I'm ridiculously proud of this shirt.  This is by far the most complicated thing I've ever made without a pattern (a real pattern, with instructions and stuff).  I was really confused about where the collar interfacing went and I'm 100% sure that's not how it goes, but I don't care. It lays pretty well when i'm wearing it.  Oh, and check out my cuffs...


Very sharp.  The sleeve has two pieces, which I think is weird.  I don't know if I'll stick with that on future versions or not.  It does make that slit very easy, though.  I'm still mulling over how to make it look more RTW with all the little details and seam finishes.


Fabric: Thrifted sheet
Pattern: My own
Notions: Interfacing, buttons
Changes: To be made in future versions
Final thoughts: I'm very happy with this pattern.  It needs a little tweaking, but I'm ready to work on it.  I definitely need more tops!

Wednesday, February 12, 2014

Thurlows I (I MADE PANTS!!!)


I made pants!  Real pants!  They have a zip fly and pockets (fancy pockets at that) and they fit and THEY.ARE.PURE.AWESOME.

I'm kind of excited about it... can you tell?

That's right.. can't you see the excitement?  No?  How odd....
January and February have been unusually sunny this year, meaning I have no excuse for not getting pics of my recent makes other than shame at passers-by seeing me struggle with my digital camera settings on my lunch break (it may be sunny during the day, but it's still dark at 5:30).  For above reason I stick to snapping pics on the weekends when it's just me and the kids...  Which is why I'm not wearing makeup.... or a clean shirt.  Sorry.


Pardon the lint and cat hair, but look how pretty my welt pockets are.  They kind of gape open a little bit when I'm wearing them though :P  For subsequent versions I'll definitely baste the lips together and see if that helps.  (I won't pretend I came up with that on my own; that one came from Lladybird's incredibly helpful Thurlow Sew Along.  I'm telling you, if you're making these pants just check it out.  The welt pockets and fly were so well explained with lots of great pictures that I didn't even manage to sew anything backwards!  That's kind of a big deal.  In all seriousness, though, her sew along did make the construction of these pants seem relatively effortless (as opposed to trying to figure it out on my own with the rather sparse instructions that came with the pattern.  Not that it would've been impossible, but it certainly would've taken longer). 

Gaping sighting.  Oy.
I flatfelled the side seams and the inseams just cuz I think they look nice that way.  Plus I don't have a serger so it's either that or zigzagging them... or bias tape but FTN I hate finishing seams with bias tape it takes FOR.EV.ER!  If I take the shortcut I inevitably end up missing the fabric in one spot and then it totally defeats the purpose.  You probably don't eve know what I mean by that because who does that seriously???  I do.  All the time.  It kind of drives me crazy that both the sew along and pattern instructions pretty much assume you'll be serging everything.  What about the rest of us?  Ah, well, I'd rather have flatfelled seams than serged seams on my pants any day.

Pretty flatfelled seams... and less pretty belt loops :P
You may remember that I won this pattern in a giveaway from Handmade Jane (thanks again Jane!).  I made up a quick muslin over summer out of some lightweight cotton.  As it turns out, though, I misread the size chart and they were two sizes too big (epic fail!).  I still wore them around the house quite a bit last summer, but I'll probably be cutting those up for quilt pieces sometime soon (trust me on this one, it's just so.bad).

Honestly I was a little intimidated after that and, even though I traced the correct size off right away, I didn't touch the pattern again after that for months.  I've made a lot of quick, simple projects so far this year (skirts, baby clothes, things like that) and I was feeling the urge to tackle something bigger.  I originally intended to make a new dress, but it's cold as F*CK outside and has been for ages.  It seemed like a good time to tackle the Thurlows again.


I had bought this black bottomweight fabric at Goodwill ages ago with the intention of using it to muslin up some Thurlows.  Of course it turns out I'm super happy with them, so they've made it into my regular work rotation.  Hopefully the fabric holds up for awhile!  It's a very drapey bottomweight fabric with (to be totally honest) a weave that's a bit loose for pants IMO.  Surprisingly they hold up very well with little to no sagging/stretching between washes.  This leads me to suspect they may be something other than cotton (surprise, surprise) but they're comfy as hell so who cares?


By the way, I've always been an avid stripe-avoider but this shirt was so soft and so new at the by the pound Goodwill I decided to try it out.  Only looking at these pics do I see how pregnant it makes me look.  Suffice it to say, I am not.  But I will probably be taking the shirt in a bit.  Maaaaaybe that'll help.


Oh God how excited am I about the zipper.  The bright ass green zipper.  It's my faaaave.  It makes zipping up my pants strangely fun.  That was waaaay TMI wasn't it?  I also like how the striped fabric I used to line the waistband ended up making chevrons at the CB.  Not even planned.  Awesome!  I just used whatev was lying around for waistband/pocket lining, since these were supposed to be a muslin.  As it turns out, though, the inside of these pants are way more fun than the outside.  Not that plain black pants aren't fun... I know they are for me =D


You can see all my ugly zig-zagged seams :P  But look: party in my pants! ;-)  Haha!


Now that I've made pants I"m pretty excited about making more.  I've already made one more pair and my next fabric purchase (remember I'm trying to destash this year) will def be some nice pants quantity 

Sunday, February 2, 2014

Seahawks Fever

Really I should have gotten around to blogging this shirt before the Super Bowl to show my 12th man spirit... but I literally just got pictures of it today (such as they are).  And I really only got pictures today because I figured posting it after the Super Bowl would just be lame.  So here we are, two hours after the Super Bowl and I suck for not busting this post out this afternoon.


I hate to admit that I'm not really much of a football fan... but when I was offered free tickets to a pre-season Seahawks game I, of course, said Hellz yeah!  I didn't have any Seahawks gear, though, and that shits pretty pricey.  I knew my dad had an old Seahawks tee he never wore anymore (never let my dad near your laundry unless you like bleach stains on ev.ery.thing) so I decided to go the cheap route and make my own.


I had seen some cool UW shirts done in this style with the multicolor raglan sleeve.  I took my knit shirt block and raglanized it.  I had scraps of the green laying around (by the way, I didn't realize this was an oooold shirt and the Hawks have totally changed from kelly green to lime green.  boo).  I can't remember where the grey came from... but i think it was part of the original shirt.  I really just sewed stripes of knit together and then cut the sleeves out of the patchwork.  All in all I'm pretty happy with how this one turned out.  And obviously... GO HAWKS!!!

Friday, January 24, 2014

Jungle January: Bite Size Edition

Aww, she's so wiggly she always comes out blurry!
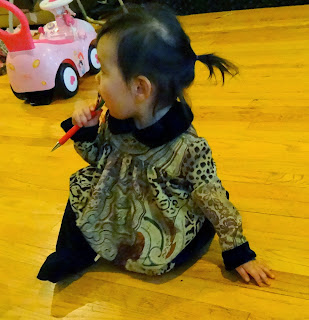
I never participate in Jungle January, not being much for animal prints, but the making of this top just so happened to coincide with it so I figured I'd steal the catchy name.  I bought a rather large woman's button up shirt from the by-the-pound Goodwill which is the main fabric for this little shirt.  It's not just an animal print, it's some kind of crazy paisley, multi-species animal print.  I saw it and had to have it.  Then I used some of it to make a gal at work a Christmas stocking (which I wish I had a picture of because yes it was awesome!!!)  As such, there wasn't really enough left to do a full garment for myself, so I opted to put it on Baby Girl.


She's such the little model, I know.  If you can't guess, this is another iteration of McCall's 8473.  This time with the matching pants.  The pants pattern for this is weird...  It's designed to have suspenders and snaps in the back and along the legs (obviously for diaper changes, I got that much).  Honestly, though, I just don't have time for that so I simplified it a bit (a lot).  I just use the  main pattern piece with the extra snap overlap fabric cut off (yes I traced the pattern first, geez!)  The pants pattern is a bit big, but she grows so fast I'm not too worried about it.  This way she'll actually get to use them for more than a month or two (hopefully!)


The pants are black velour (I think that's what it is anyway).  It's from a maxi length skirt I had in high school for band concerts.  The skirt was definitely showing some wear (most notably from when I tried to hem it with purple thread WTF?) and had generally seen better days.  There was actually just enough for the pants, collar, and cuffs.  The fabric is stretch so it was rather a bitch to do the collar and cuffs, but the pants were easy peasy and oh so warm and soft.


There are four big black buttons on the back.  I was almost surprised I found that many matching ones.  They're all from the big bag o' buttons I found at the thrift store...  Or in the big bin o' buttons that came from my mom.  They're all pretty well mixed together at this point.  It's nice to have lots of buttons on hand for when you need some, but it gets messy finding a number of matching ones!  I started organizing my buttons by color, but kind of petered out at some point.  I really should finish doing that...


The collar on this one is a little crazy but, again, it was really hard to sew that stretchy velour to the not at all stretchy animal print polyester.  Again, I could probably fix it, I just lack the motivation.  

All materials were from stash (yeah! for shopping the stash) but even considering what the main fabric and buttons cost when I bought them, the whole outfit wasn't even close to costing a whole dollar.  Score one for thrifting!


I really like this outfit.  I feel like it's kind of sophisticated since they're less childish fabrics/prints.  She's more like a real person every day!  (A tiny person, but a walking, talking person nonetheless).

Wednesday, January 22, 2014

FO : Pink Poodle Skirt (sans poodle)


Enter: Hollyburn the third.  (No, you still haven't seen the first one.)  I love this pattern!  It's just the shape I like my skirts... although all the old people I know call them poodle skirts.  Especially this one because, obviously, look how pink and voluminous!  All I need is to applique a poodle on the bottom and I'm set for the sock hop ;-)


I do think it's weird how the grain lines run on this pattern and I don't really understand how things are supposed to hang.  This skirt is cut accurately (I thiiiink) using the pattern grain lines, but there are some weird lines as the front and back seam stick out a little oddly.  The odd thing being that they stick out directly to the side of the seam instead of along it.  WTF?  I don't even know.  My grey Hollyburn doesn't suffer from this problem so much as the fabric is very fluid and drapey.  The fabric used for this one, on the other hand, is a super stiff cotton (cotton twill perhaps?) so it has a lot of body.  Incredibly it doesn't really wrinkle that much; these pictures were taken after I'd been wearing the skirt all day.
My face was actually so scary in this pic I cropped it out.  You're welcome.
This is View B, the medium length.  This one and also my grey one both have pretty sizeable hems (about 2 to 2.5 inches) and this one I still think is a bit long.  I'll probably go back to the shorter version with a nice narrow hem (much easier to ease in!) for the next one.

This being my third rendition, it went pretty quickly with only one big problem....  I forgot to interface the waistband!  If I don't tuck in my shirt you'd never notice it... but for some reason I felt the need to share, so here you go.

My shamefully floppy waistband
 I seriously love the pockets on this skirt.  They're big enough to hold so.much.stuff.  Next time I make a full skirted dress I may well just use the hollyburn skirt and pocket pieces.  The pockets look so oddly shaped, but they are certainly effective.  You can even fit a small orange in there!

Wait...  Is that weird?

So pocket happy!
Speaking of the pockets... I actually didn't have enough fabric to cut the pockets out of my main fabric, so the pocket front is a contrast fabric.  I found this fabric at the thrift store (so obviously the skirt was uber cheap, just like my last one).  Much to my chagrin, that contrast fabric peeks out just a bit.  Next time I'll do it the way the Thurlow pattern does it (that's right, next up: pants!).


 Let's get real about zippers for a second.  Look how awesome my zipper is.  Since this is my third time making this pattern it should be perfect (which it isn't, obviously the waistband is maybe half a centimeter off at the center back GAAAAAAHHHHH!) but I only had to sew the zipper in once and it looks pretty friggin good if I do say so myself.  It miiiiight not look as nice on the inside, but I'll never tell ;-) 

I'm getting closer!
What else is there to say?  The only thing I can think of is: expect more of these in the future.  In a far-off, warmer future where there's sunlight past 5pm and tights don't have to be worn all the time perhaps... but they will certainly happen.  I'm not sure it's possible for me to have too many Hollyburn skirts.


Sunday, January 19, 2014

Dusty Rose Baby Shirt


The second iteration of McCall's 8473.  Can I just tell you briefly how completely in love I am with this pattern?  There are gathers, a peter pan collar...  It's just so damn cute.  Fortunately Baby Girl is a pretty good sport about being dressed up and photographed (so far).

The actual pattern
And she's so cute!  In pictures, especially, as she's much quieter in that form.  I had just a little bit of this brown fabric left after I made myself a button up shirt.  We have not had a chance to dress up in our matching shirts yet, but we will I'm sure.  The piping is a pink and white plaid I used on Baby Girl's Christmas stocking (oh no!  I just realized that one hasn't been blogged yet.  I'm working on it, promise!)


I didn't have enough of the brown or the pink to do matching pants, so this time it's just the shirt.  I used the same view because, well, basically because I love it.  I do want to try it with the poofy sleeves sometime, though.


The collar sort of sticks up oddly and I'm not sure why.  It's done the exact same way as the first one and I didn't have any problems with it.  Actually, now that I think of it that is a lie.  I couldn't find any interfacing when I was sewing this, so I just doubled up on the fabric on one side.  Maybe that's why we use interfacing... I think if I tack it down it will probably be ok.  Now I just need to work up the motivation to do so.


I'll admit that the back is an epic fail.  I forgot to make sure the hem lined up on either side... and then one button turned out to be sewn on just a little bit off.  In case you ever wondered why most button holes are vertical instead of horizontal: here's your answer!  Vertical button holes are infinitely more forgiving.  I have ripped off the offending button and not bothered to sew it back on.  After all, the hem will still be uneven.  Le sigh.


But that's ok, it's still too cute from the front!  Even with the wonky back and collar I still love how adorable she is in this.  That's two projects completed for small people this year, so far (actually, three: one you haven't seen yet!)