Saturday, January 4, 2014

Baby Girl's Christmas Outfit

Opening pressies
Stealing strawberries
Twas two days before Christmas when, emboldened by success,
Mom decided baby girl needed a new Christmas dress!
Something white, green, and red with a round little collar
Something vintage, with ric-rac for my little crawler.

The pattern, the fabric; twas all in the stash
But the buttons Mom had, how they all did clash
So off to the store after work Christmas Eve
She found ric rac and buttons and fabric she couldn't leave

Christmas morning found her threading elastic
Surrounded by boxes, paper, and plastic
Just in time for the presents, candy and food
The outfit was finished and it sure did look good

So excited for hot chocolate pants!
Ugh.  Sorry for the totally unnecessary thing that just happened.  I'll try not to do it again...  I will probably fail, but I will try.  The holidays put holes in my brain, I swear.  In case you need further proof, the Sunday before Christmas I became convinced that Baby Girl must have a new Christmas outfit.  You know, because The Boy got new clothes for Christmas... and that's what kids really want for Christmas: homemade clothes.  Yeah.... ok.


I happened to have this lovely little vintage pattern that is just exactly Baby Girl's size (it's size 2 years and she's pretty big for her 18 months).  I got a big package of little people patterns together at Goodwill for $2 and this is only the second one I've used....  Unfortunately I better get crackin' on the rest of these if I want to use them, for as we all know, size 2 years is not a lengthy visitor.


I picked up the fabric for the top at the thrift store on the cheap; $4 for 4 yards.  Once it was made up it just begged for matching pants.  I'd been eyeing this hot chocolate print fabric since they got it in at the fabric store and just couldn't justify buying it with no project in mind...  problem solved!  I love the way the two fabrics look together.  The print on the top is so tiny and the cups of hot chocolate are so big.  Combined with the big red buttons and teeny little ric-rac....  well, it's starting to sound a little unbalanced but I think it comes together perfectly.


The fiddliest part of this pattern is piping and attaching the collar.  The neck edge is bound in bias tape, which  (being an adamant facing-hater, I dig) but gah, them's some thick rolls to try and bind with bias tape.  I think the trick is to just clip the seam allowances close, stitch the tape down, then iron the shit out of the whole thing to keep the collar in place.  That's really all I've got.

As you can see it's already covered in food
The pattern didn't call for the piping at the bottom of the front bodice piece, but it was easy enough to add and I think it looks really cute.  It's a little weird how close it is to the huuuge collar, but I think it makes the gathering pop a little bit.  And, you know, yay piping!

Look how well the bottom and ric-rac match up.  Boo-ya!
Oddly, I never seem to have red anything so I definitely didn't have any big red buttons.  Fortunately when I went to buy big red buttons, I also found the hot chocolate fabric 30% off..  Meant to be?  I think so.  Anyway, I think that's about all there is to say about this set.  I've already made up another one of these tops and there will be more (one is already cut out!).


Dear Baby Girl: You just get cuter and more loveable every day.  Stay sweet and happy please :)

Thursday, January 2, 2014

New Year's Day Skirt

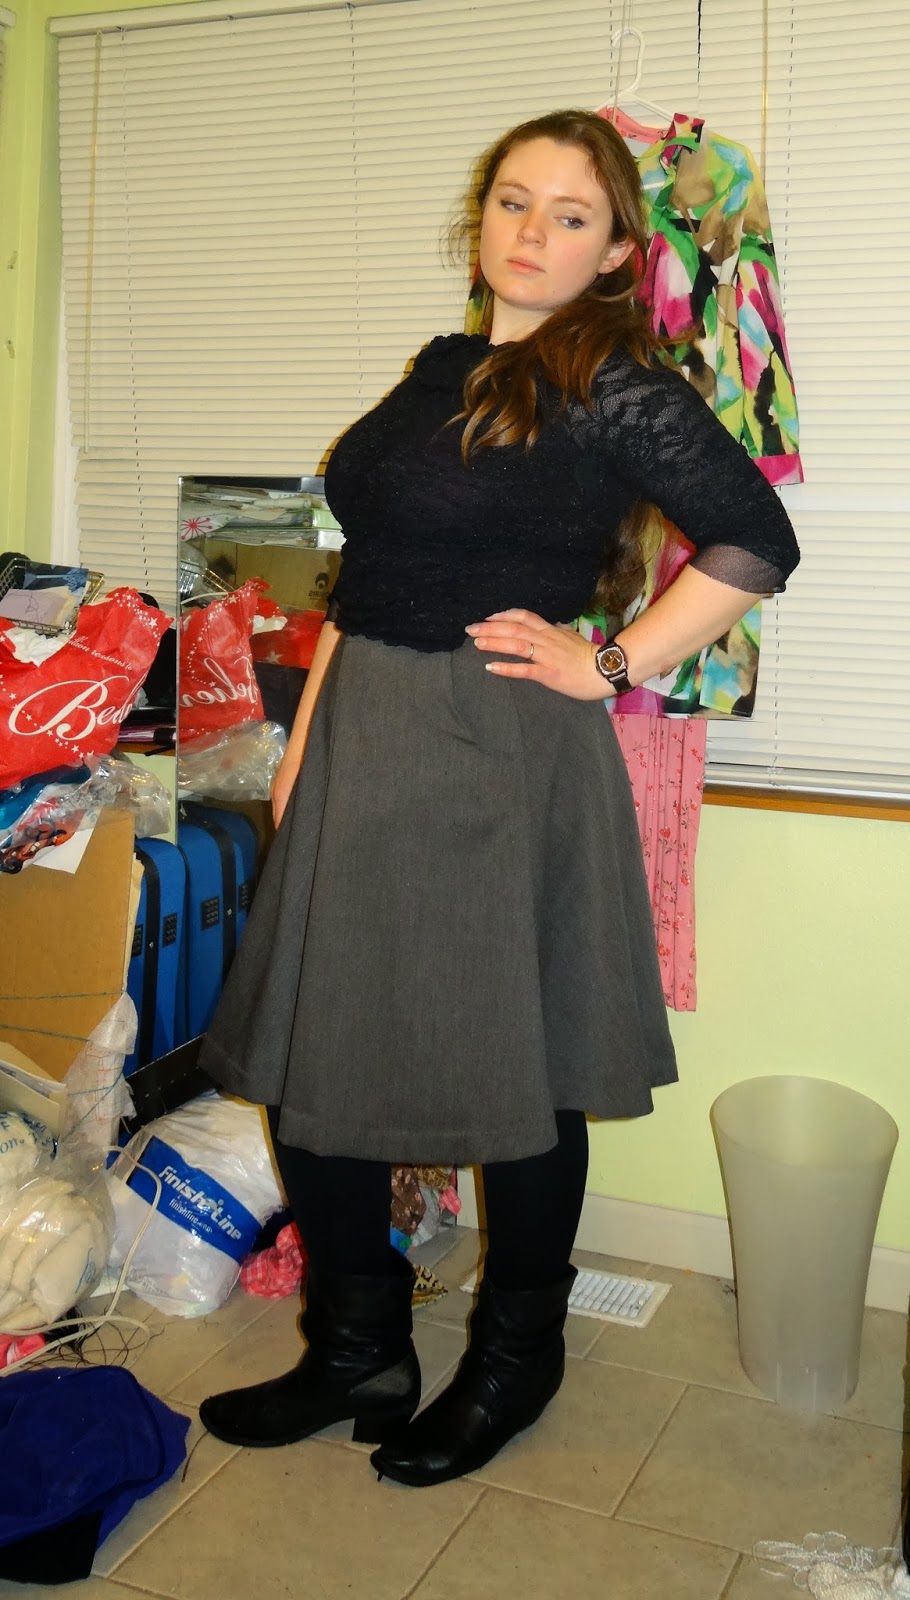
Here's hoping you all had a wonderful New Year holiday (and will go on to have a wonderful 2014 in general).  I had a nice relaxing New Year's Day off of work and got some sewing (and some cleaning, yeesh!) done.  I managed to just barely finish a Hollyburn skirt from start to finish.  The only thing I had left to do after the kiddies got up was handstitch the hem (and boy what a hem that is!  It just keeps going and going and....)

I actually just love how awkward this picture is
This is my second Hollyburn skirt (the first remains unblogged, as of yet).  Apparently I've gotten rusty when it comes to garment sewing because this thing just killed.  I started cutting this skirt out right after Halloween.  I cut one back piece with the grain running vertically instead of on the diagonal *facepalm* and was so disgusted with myself I had to shove it out of sight until after Christmas.  Of course, I had other, more Christmassy things to be working on at that point, so that was just as well.  It's easier to face the epic quilt of Christmas when you've just failed at a skirt.  Cuz, duh, if you fail at a skirt then why are you sewing dumbass?  Obviously because I can't take a hint.  But what else is new?


I pulled it back out New Year's Day, determined to either make it or trash it.  I went ahead and cut the other back piece the same way.  It actually turned out to be just fine... I'm not sure that it's detrimental in any way.  I think it actually looks better than my first Hollyburn.  I won't go so far as to attribute that completely to my "design feature" though.


My theory is that consistency is key.  Consistency is what turns a mistake into a design feature. I kept the original grain lines for the fronts since I didn't know how the grain change would make things flow.  An ugly skirt front is much more bothersome than an ugly skirt back.  Speaking of which...

This might actually be my best zipper ever.  Look how pretty
Zipper!  One of my sewing goals in the coming year is to figure out zippers.  I never can seem to install one without tears (and possibly the occasional blood and/or sweat).  As a matter of fact, the only reason this one looks passable is that my thread really is that great of a match.  In truth I had to rip out about an inch on one side because the zipper would.not.shut.  At all.  Ahem, I have a problem of sewing too close to the zipper teeth and then, obviously, the zipper pull can't move :(

I will explain why my kitchen looks like this very soon...
Ahh well, at least it's more or less working now.  It may still stick just a wee bit in one spot, but I'll call it passable.  I bought this fabric second hand quite some time ago.  I  It's very textural and rather thick, but stretch and a little bit sheer.  It's really weird.  On first sight I immediately thought "pants!" but once I brought it home and examined it I realized it's definitely not right for that.  Of course the interfacing in the waistband negates the stretchiness that might otherwise allow an especially large lunch, but that's probably for the best.  (Damn New Year's and it's silly resolutions.  It always makes me want to be better all at once, and that's kind of exhausting).

Awesomely large pockets!
I made view B, the medium length, and the hem is about two inches (or maybe a little more).  It hits a little below the knee, so it's just perfect for work.  I was afraid that the mystery fabric would be difficult to hem, but in fact the width eased in beautifully because of the vertical ridges running through the fabric.  Would that it could always be that easy!

My pretty handstitched hem... and not so pretty zigzagged SAs
 The side seams are French seamed, the pocket raw seams are bound with bias tape, and the front and back seams are zigzagged then pressed flat :P  That's what the pattern recommended so that's what I tried.  They're both such awkward seams to finish because you've got to press them flat (so definitely no flat-felled seams) and they're so visible.  You don't want anything that will interrupt the fluidity and drape of the fabric (at least that seams to make sense to me).  Next time, if the fabric is thick enough, I'll try bias tape.  For reasons I can't quite explain, I just hate zig-zagged seams.  I hate the way they look and I feel lazy using them.

Center front cut with the original grain lines
As it turns out, I love this skirt.  Having the center back on the straight of grain made it waaay easier to put in the zipper without weird ruffliness at the edges.  A plight that, sadly, my first Hollyburn skirt suffers from.  The whole zipper area on that one is kind of a clusterfuck as a matter of fact.  Plus, I never got around to the hook and eye.  Because, obviously, who has time for sewing on hooks and eyes?  Oh wait!  Apparently I do!  (For this skirt anyway.)  

I promise there's a reason for that big pile :(
End result: I love it!  It's my new favorite skirt.  I'm already eyeing all the pieces of fabric in my stash that might be suitable for Hollyburn skirts.  Muuust haaave moooore!  By the way, with all the supplies this skirt couldn't have cost more than $5 to make.  Which is pretty exciting.  I know that this post is about the least exciting garment on the planet (dark grey A line skirt anyone?) and it probably doesn't warrant as many photos as it got... but what can I say?  I'm kind of excited about it.

Don't I look so excited?
Now I just have to figure out my bloggy resolutions (and maybe some top 5s?) and get that post together.  I like to think of January as a grace period....  It's a new year all month long right?

Saturday, December 28, 2013

Christmas comes but once a year...

Because it would kill us if it was any more often!  Christmas is my absolute favorite holiday, and I hope that you all had wonderful holidays where you didn't have to work and got to spend lots of time with loved ones eating yummy treats!

Baby girl walking with the help of big brother
We had a wonderful Christmas and I, for one, am breathing a sigh of relief that it's over.  Now that my sewing room no longer doubles as Santa's workshop things are slowly going back to normal.  The wrapping paper and boxes are mostly picked up, and the slew of new toys are entertaining the kiddies for minutes at time ;-)

Epic peekaboo sessions
It would feel incomplete to post without a little explanation of why it's been so long since I've been around these parts.  Not that it really matters to anyone wandering through here, just that I think it deserves to be recorded how terrible my luck is with technology and how awesome the guys in my life are.  A broken digital camera left me with nothing but (relatively) crappy iPhone pics.  Combined with a lack of sunlight before 8 or after 4 (it seems sooo long since I've seen the sun) there have been no usable pictures taken for ages.  Then, of course, my computer went completely berserk after downloading Conduit (Facebook, I'm looking at you and your big evil jerkface) and hasn't been operating really at all for months.

The boys class trip to the fire station
Then Christmas came and my lovely, generous hubby got me a really nice new digital camera (that's like 20 megapixels omg! I didn't even know they made that many megapixels) and my wonderfully clever father fixed my computer (hopefully it just stays fixed!).  Now I'm ready to share some recent makes (especially all the Christmas makes, cuz you know there were plenty of those!)  For now, though, I'll just share these few quick photos of the last few months.  In case I don't manage a New Year's resolution or year in review post in the next few days, HAPPY NEW YEAR!!!

Saturday, September 21, 2013

Hawthorn in Candyland

In case you hadn't guessed from the title, I think my face here pretty much says it all:


How did this one particular Hawthorn come out so messed up?  Good question.  Let's analyze this logically.  The fabric: the fabric is light weight and definitely made me think of cheesecloth.  It's sheer enough that I thought it would be prudent to underline it.  Except I knew I didn't want to underline the peplum or the sleeves (cuz that's obviously waaay too much work) and somehow I ended up only underlining the front pieces.


See all those wrinkles under the bust?  WTF?  I did add a FBA to the pattern pieces and I noticed a little bit of this on my rayon Hawthorn as well so I'll be retracing the original piece and just dealing with the slight gape-age (no matter how I spell that my computer insists it isn't a word but I'm sure ykwim).  I have no idea even how to fix these without completely taking out the front waist seam and I just don't have the energy for that right now. 


I originally wanted to make a sleeveless dress with this fabric but I'm pretty glad I didn't.  I honestly kind of wonder if a fabric this flimsy will hold up to the wear I put my clothes through.  I run and play and catch shit on door handles and don't hand wash anything so, yeah, I'm pretty rough on my clothes.  Plus the pink, green, and orange in those pastel shades is really pretty obscene as a garment.  Why did I buy this fabric?  I mean, aside from the fact it was sooo cheap.  I really probably should have reserved it for baby girl clothes.  That kid can pull off colors that I cannot.  And I think it's more than fair to point out this shirt is a combination of several colors that just don't suit my coloring.


And that f*@#%ing facing is perpetually popping out!  This one hasn't been tacked down yet but it will be.  I've found that the bar tacks at the shoulder seams on my blue Hawthorn more than do the job of keeping the facing hidden.  I do have to iron the collar every.single.time I wash this thing.  That tiny little collar just doesn't want to sit right.


I know I look like I'm about to mug somebody in this picture, but it's like the only one I have where the collar is ironed down all nice and proper so I included it.  The rest of the pics were taken after a looooong day at the zoo in Tacoma.


The back is a whole 'nother story.  One which I can't even begin to explain.  I assume that the fabric is so flimsy it just kind of stretches and poofs.  You must admit, there's some distinct poofiness about the upper back.  I would assume I had accidentally cut something off grain but, plaid, duh.  I think I would've noticed.


I do love the bias sleeve band on this pattern... if not the fact that the cut pieces are always way too big when I try and sew them on.  I steamed the hell out of the pieces and eased them on for this shirt, I just took in the seam to fit on my blue one.  I'll just take it in from now on I think, it was way easier and doesn't seem to have affected anything.  It's so cute in the plaid, though.


Ahh, yes...  Did I mention I didn't have enough fabric to make a dress and match plaids.  Well, I failed to match the plaids anyway, so, yeah... my bad.  Coulda just made the dress after all, apparently.  Actually the plaids kind of match in some places... but that's about the best I can do.  It's just a totally weird plaid.  See how big the repeat is?  It's like an eight inch repeat or something!  Crazy.


The insides are pretty awful.  The sleeves are bound in pink bias, the waist seam in dark red, and the hem with pastel mint green.  All these colors actually kind of match the fabric, and I think that's what's so awful about it.  Who ever thought to combine these colors in a plaid?  I think it's the green that really ruins it for me.  Why not white?  


Close up of the cute cuff detail.  It's a little wavy from being so aggressively eased.  Even in the solid fabric the bias cut band really looks cool.  I know I've bitched this entire blog post, but let's get real for just a minute: I wear this shirt all the time.  It's really cheerful, casual enough for jeans but can be dressed up for work, too, and I really do love this pattern.  If I can fix the wrinkles up front I'll be completely satisfied, even though I think the color scheme is slightly off for my skin tone.  Since I'm super tan right now, though, I guess it's okay ;-)


Pattern: Hawthorn by Colette Patterns
Fabric: Cotton gauze (idk, seems like a good description) from Goodwill
Notions: random bits of bias tape, also all thrifted and several buttons out of a big mixed bag of pink buttons for crafting
Total cost: Less than $5 (not including the pattern, of course, of which purchase I feel totally justified by now).
Make again: why even ask?
Final thoughts: I think I summed it up pretty well in the paragraph above; not quite a happy ending, but not a hopeless one either.  And other than the buttons this whole thing is, you guessed it, reloved.

Thursday, September 19, 2013

Thrifty Thursday: shut the front door


Ohmygoshyouguys!!!!  I found this rotary mat at Goodwill for $3.99

Excited much?  Soooo much.  My old mat was a much smaller size and somebody stepped on it and broke it so I really needed a new one.  I was toying with the idea of buying one, but $60 to $70 is a lot of money... a lot of money that could be spent on fabric!  Oh, the dilemma.  

Then the thrifting gods smiled upon me and I found this 36x24 inch mat at Goodwill.  It wasn't even in the sewing section, I just randomly spotted it as I was walking through to home wares.  It was seemingly permanently bent into a tube, but I (and my dad, thanks dad!) spent some time flattening it out under furniture, with warm irons, with sock feet (veeery carefully) and it's definitely flat enough to use now.  As a matter of fact it fits perfectly on my sewing/cutting table and has already gotten some use (there may be another quilt brewing in the near future).

So now you know, if you find a rotary mat at the thrift it's probably worth buying, even if it's a little bit bent out of shape.  Those things are so damn expensive new, I'd rather do the work than shell out all that extra cash.


Anybody know what this is supposed to mean though?  It's in the lower left corner.  Did the mat originally come with a magnifying glass?  Or is it just a handy hint?  I can't even begin to guess.  Underneath it just says "Made in Japan" so that's no help.

Anybody else lucked out at the thrift store lately?

Wednesday, September 18, 2013

WIP Wednesdays: Anna Karenina


So this blanket is named after the book.  The interminable, never-ending book.  I started it while reading Anna Karenina... almost a year and a half ago (!!)

I finally cheated and finished reading the book on iBooks.  The blanket?  She remains.  Linen stitch takes forever, yo.  I don't really intend to finish this blanket any time soon; maybe next winter or the one after?  As new yarns find their way into the scrap pile it changes the look.  Of course, the look of this blanket will always be a crazy hodpodge of everything but the kitchen sink.  But that's what I love about it.


A very unhappy baby for scale.  You'd probably be unhappy too if somebody interrupted your playing to lay you down on a blanket and take pictures!  This blanket is about 3 feet (yes I measured it which means, basically, baby girl is HUGE!) so it's about halfway done.  I had to set it aside during summer but now that the weather's cooled off there's no better knitting project than a big, heavy half of a blanket you can curl up under while knitting =)

What are you working on now that there's a chill in the air?  Or is summer still going strong where you live?

Tuesday, September 17, 2013

Falling for indeterminate weather conditions

It hasn't been too long since I walked out the door one morning and smelled it: fall.  I love the transition of seasons.  The scent and feel of change in the air.  Fall means school (not for me anymore, but for the boy), Halloween, leaves changing colors, fires, and pumpkin spice lattes... which I don't personally partake in, but they smell very seasonal.  Plus, you know, Christmas is coming.  Yay Christmas!


Why all this waxing poetic about fall on a post about a seemingly summer dress?  Well, the first day I wore this was the first day I could smell fall in the air.  Since then it's bounced back to 80* so it's not like it didn't get some sunny action this year.  This is the time of year in Seattle where the mornings tend toward the seriously cold and rainy side whereas the afternoons can either continue with the theme or be just the opposite: hot and sunny.  Which can make it impossible difficult to dress appropriately for the weather.


Which is why I would argue that a sleeveless dress under a warm, snuggly wool cardi is perfect fall attire.  Please forgive the mall parking lot pictures.  It's a long story and I shan't bore you with it.  Note that the sun came out mid photo shoot and combined with the overcastedness of it all to turn me whiter than I even am...  I made that cardigan and one day I'll actually blog about it.  Le sigh.


The pattern is the Hawthorn once again.  This time as a dress, obviously.  The more eagle eyed amongst you may note that I switched out the collar for a tie.  I was blatantly trying to rip off very inspired by Cirque du Bebe's Sew Bossy La Sylphide.  Gorgeous.


My collar came out a little more school uniform than effortlessy chic and flowy, but I'm dealing with it.  I didn't see investing in La Sylphide when it's so obviously meant for ladies with longer, lither limbs than my own (that shit is shooooort!), and I felt like it was easier to just stick with a pattern I'd already made up once (or twice, to be honest.  coming soon.)


It's ok, I'm still happy with it.  I'm actually thinking of getting some more of this yummy rayon challis in a different print for another Hawthorn... maybe with a regular collar this time?  And pockets.  My God, this pattern needs pockets.  All patterns need pockets.  That's the only thing stopping this pattern from being perfect.


The waist darts somehow don't pull in the underbust and waist area as much as is needed.  Thus the belts in both sets of pics.  It doesn't really fix the problem but I feel like it doesn't look as bad that way.  I think this is an unfortunate side effect of the FBA I made as the first one did not have this problem.  Or it could be because the rayon was a slippery little bitch and my pieces were all slightly, ahem, wrong.  Sigh.  Why must fitting be such a neverending struggle?


See, very swishy.  I haven't bothered to consider a swayback adjustment for this pattern... I know I do often need one but I think this pattern is cut high enough for the waist and full enough for the skirt that one's not really needed. By the way, for those of you who haven't made this pattern yet: the staystitching.  My God.  It's neverending.  There are approximately 8 million pieces to be staystiched.  Blergh.  


I went so far as to copy the idea of self cover buttons.  The buttons are actually mismatched in size/shape a little bit.  They all came from Goodwill at various times.  Even though the fabric is new there's still a little bit of reloving going on here.  I don't think it's terribly obvious that they're mismatched since they're all covered in the same fabric.


On a side note: why must self cover buttons be such a pain in the ass.  It's starting to sound like I didn't enjoy making this dress, which isn't actually true.  I didn't really worry too much about perfection when cutting and the self cover buttons, well, those are always going to be a bit of a struggle but they were much easier this time than the first time.


The insides of the armholes and waist seam are bound in yellow bias tape.  That waist seam; it's thick.  I don't really know what would be the proper way to finish a seam like that.  It's necessarily thick but falls somewhere you really don't want a lot of extra bulk.  I think the bias worked better than the French seams I did on my first one, though, so I suppose I'll stick with that.  The rest of the seams are Frenched.


On a side note: check out my new shoes!!!  Aren't they great?  I got them for $24 marked down from $80.  They aren't particularly green in nature (nor, obviously, color... they're a great mustard with white eyelet trim) but we can't be perfect all the time.  Small steps, guys, small steps...  

Pattern: Collette Patterns Hawthorn
Fabric: Rayon Challis from Pacific Fabrics
Notions: Yellow bias tape, many self cover buttons
Cost: about $30 in total, almost all for the fabric.  The notions were all thrifted
Make again: And again, and again
Final thoughts:  It's not 100$ what I expected but I love it!


I have no idea what is going on in this picture, just that my husband is not good as a photography director.  This picture did make me laugh pretty hard, though, so I'm including it.


Thursday, September 12, 2013

Thrifty Thursdays: a whale of a wale

Nearly three yards of wide (veeerrry wide) wale cord for $5.  Nom.


I love all things late 60's and 70's so I'm pretty excited about this find.  Now I just need to make it into pants and we shall live happily every after.

Thrifty tip: When buying fabrics at thrift shops unfold as much as you can to see if there are any worn spots, holes, stains, or fold lines.  Sometimes when a piece of fabric is folded for a long period of time you will see discoloration on the outer portion or a discolored line where a fold has been.

Til next time!

Wednesday, September 11, 2013

wip wednesday: when whales fly


appropriately enough that's probably when i will finish this.  when whales fly, that is.  

but if i do ever finish it?  totally epic

pattern here.  if you ever embroider check this site out.  i'm sure my grandma never could've imagined i'd be embroidering flying whales or calaveras.

Tuesday, September 10, 2013

more zombieeees

So I'm really not sure where the fascination with zombies comes from, but if there are zombies on it it's a win in his book.


I was still working on this when he came into my sewing room and got all excited.  "Zombies!  Zombies!  Hey look: zombies!"  I soon realized he had found his new shirt and decided that it was, what else, a zombie.  I would've gone with just skeleton, but I suppose once it starts walking around it's a zombie?  But do zombies skateboard, I think is the big question here.  


In all honestly I was a bit hesitant about making this shirt.  I thought it was pretty cool when I picked it up at Goodwill, but upon further perusal began to wonder if a boarding skeleton holding a bottle of... something... was moderately inappropriate attire for a four year old.  


Really, that's a debate in and of itself.  What is and isn't appropriate to dress your kids in?  Is dressing them up like a gangster just asking for trouble?  I feel like this shirt is pretty cool looking and innocent enough, but would some say that it's too adult for him?  I don't know.  Well, probably some people would... but some people believe vaccines and electricity are evil so, well, there ya go.


I finally realized why I keep getting puckers along the neckline when I use this pattern.  (Obviously I used the raw edge raglan from Sewing for Boys, as usual.  If it ain't broke don't fix it right?)  The seam allowances included in the pattern are probably 3/8 or 5/8 of an inch and I always sew knits with a 1/4" seam allowance.  Next time I'll cut the neckband accordingly.  Obviously it's too late to help this one but he doesn't seem to care much.


And just for fun some rolling around in the grass pics =)  On Labor Day we went to the Tacoma zoo and saw the sharks and generally a great time was had by all.  Although the grown ups were pretty exhausted by the time we got home!


I did not make baby girl's clothes, but isn't she precious with those little pigtails (squee!!!)  They play together so well.  I'm really impressed at how well the boy protects and plays with his little sister.  It pretty much melts my heart the way he takes care of her.