Showing posts with label vintage sheets. Show all posts

Thursday, June 20, 2013

the amazing garden gate dress

at long last an actual <gasp> post!  and one about the much-seen simplicity 2174.  this is one of their amazing fit patterns and, well, what can i say?  amazing!


i feel like the pictures just don't do it justice, and i sincerely hope that i'm right.  seattle likes to bounce between rainy and cold and 70 and sunny... all in the same day.  that makes it a little difficult to dress for the weather.  layers people; it's all.about.layers.  


ohh, yeah.  i was saying: the sun really bleached out the pretty pattern on this dress.  it's a light grey background with a darker grey iron work design and purple flowers; thus the name "garden gate."  it's quite pretty.  it was originally a sheet, but i don't think that's super apparent.  i do think that there is a store somewhere with a bunch of really cool sheets.  mine are pretty boring in comparison.


the pockets on this pattern are amazing!  even more amazing than the fit (which is also pretty amazing).  it's a princess seam dress with different pieces for each cup size.  there are a million pieces with this pattern, but don't fear; you won't be cutting out very many of them.  the pockets are part of the front side skirt pieces.  when i made this dress the first time (just cool your jets, there'll be a post about it someday, too) i was just amazed.  in all seriousness my mind was TOTALLY . BLOWN.  i walked around showing everyone who would listen: "look at these pockets.  can you even believe how awesome these are?  they're set right into the seams and everything!" 

yes.  i'm easily entertained.  it's the small things in life, people.  cherish the small things.


as a brief aside: whenever i wear these boots my husband calls me puss in boots.  that's a real confidence booster right there.  i've reached a point in my life, though, where i'd rather be mobile than look good in my high heels.  therefore the high heels are on vacation.  indefinite vacation.  boo.  maybe someday...


what's that?  a foe!  sneaking up behind me


phew!  just the boy stealing the spotlight as usual.  and hey, look, i made his shirt =D


what's that?  a sword!  apparently he thinks i look like puss in boots as well.

this is actually one of those epic fails i mentioned a few ages weeks ago.  i put on the dress and realized i couldn't move my arms.  like AT ALL!!!   in a moment of desperation i hacked the sleeves off and applied a little bias tape here and there.  unfortunately....


i could go on but i think the picture speaks for itself.  yikes.  between the seam allowance that were cut off and the new ones for the bias tape there was just too much removed.  


yup, pretty bad from the back too.  these pictures were taken at the end of a long work day so scuze the wrinkles.  all things considered, though, i don't think it's that bad.  i did do a swayback adjustment on this dress.  normally it's not that wrinkled but again, work.  


ooh, zipper.  long and handpicked, as a matter of fact.  as you may be able to see from the distribution of wrinkles, some of those are actually permanent and i'm not sure why. because the pieces weren't sewn together quite right i assume...  there's also a strange burn? on front of the bodice.


fortunately i didn't spring for or spend time on lining.  i do wear a slip/cami with the dress, but what with the sleeve debacle i'm glad i didn't waste my time.  the seams are all french or bound with bias.  perhaps that's why the wrinkles?  can you french seam princess seams?  well obviously you can but whether or not it's advisable i won't speculate upon here.  i do like the cheery yellow bias tape.  it's like my fun little secret ;-)

i love this dress.  i have two from this pattern now and i always feel awesome when i wear them.  they're so fancy yet functional (yes that is a thing) and about as comfortable as a dress this fitted can be.  amazing?  yup.  amazing.  i want to make so many more of these.  unfortunately other things beckon (i'm looking at you karen and your awesome pajama party.  i'll be there.)

so there you have it.  i have been making things.  told ya!

Tuesday, May 21, 2013

Paisley Darling!

You may remember the sneak peek of this shirt from last week.  So here's the scoop:

Horrid MySpace quality photo
I bought this sheet at Goodwill with the express purpose of injecting some 60's paisley shirt love into my wardrobe.  I found a Threads button up shirt pattern on clearance at the local fabric store and figured for $2 it'd be worth a shot.  Sadly the result was lackluster.  You saw it briefly (and blurrily) at the end of Me Made May Week 2 and once I get the sleeves fixed you'll see it some more.  After spending sooo much time (collar stands are hard, yo) on something so lackluster I wanted some instant gratification so I returned to an old favorite.

Can you feel the happy?  Not really, but it's there.
As you can probably guess from the title I used the Darling Ranges dress-turned-shirt pattern with the collar piece from some random dress pattern I haven't even tried out yet.  The collar is a bit, erm, large... but I've decided I like it.  It's retro, if you will.  And you will here, because this is my blog which means I make the rules here.

Oooh... So pointy
Besides, all the better for collar popping amiright?

Totally epic collar pop
Since I've made this pattern in it's various forms about a bajillion times there's not a whole lot left to say about construction I guess. 

Weirdly awkward photo, but aren't the rhodies pretty?\
Except that I raised the neckline about an inch and a half.  This feels a lot more work appropriate to me.  Unfortunately I think that this modification has somehow introduced an excess of fabric just below the shoulder and above the boobage creating a liiitle bit of fabric pooling.  
Are you staring at my boob pooling?  Gah! Don't look!  Just kidding; go ahead
I have a hunch that if I take out a smidge from the front shoulder and maybe level out the slant a bit (square shoulders + slanted pattern pieces = no bueno) it should fix the problem.  How long has it been since this pattern at all resembled the Darling Ranges dress?  And how weird is it that I never actually made up the pattern as written with the dirndl skirt and side pockets and everything yet I've made so many modified versions?

One thing I haven't done but need to: SWAYBACK ADJUSTMENT!!!!!
  Since spring has been doing it's violent meandering thing lately (meaning that it was 80 degrees two days last week, raining balls and cold today, and a little bit of everything between has happened between the two including crazy gale force winds that take down trees!) I realized I have a serious dearth of summer tops in my meager wardrobe.  Is that the longest most pointless sentence you've ever read?  I'll bet it is.  This pattern is great sleeveless.  It's got just the right amount of coverage and binding the armholes with bias tape instead of the pure evil that are facings is genius.  Easy peasy =


You can sort of see the totally randumb green thread I used for everything: topstitching, sewing on white buttons, etc.  I had this thread leftover from... something.  I couldn't find any white thread and I wanted to sew noooow.  So I grabbed this not-really-matchy avacado green thread and I thought it would stand out.  It turns out nothing stands out agains this crazy paisley haha!  This picture totally fails to show you two important features of this top.  First, I used all different buttons.  They're all white, they all have two holes, and they're generally the same size, but they're all slightly different.  This was (believe it or not) intentional.  I've seen some reeally bold mismatched buttons here and there lately and it's a look I can get into, especially seeing as how I bought a huge bag of assorted buttons from Goodwill awhile ago and am slowly realizing how few matching sets there are :P

This photo has nothing to do with what you are about to read but it;s wonderfully awkward non?
The second thing this picture fails to really show is the total lack of matching up of those under bust seams is happening here.  See my fingers?  That's where the seams are.  Yeah, I know.  WTF?  Where was I looking when that happened cuz usually I'm all over that one thing.  If nothing else I at least try to match up those big seams.  By the way, the photo above has nothing to do with this paragraph, I'm just trying to stick to the format: paragraph --> picture ---> paragraph---->  etc, etc....


Time to Make: 4ish hours over two days

Cost: Basically free, fabric, buttons, interfacing, pattern, and even weird green thread all from stash

Verdict:  Isn't it obvious?  I love it

Make it again?  Again and again and again


Monday, April 1, 2013

Baby Girl Easter Dress

What would Easter be without the toke last minute must finish super cute baby girl dress?  Relaxing perhaps?  Even, dare I say it, easy?


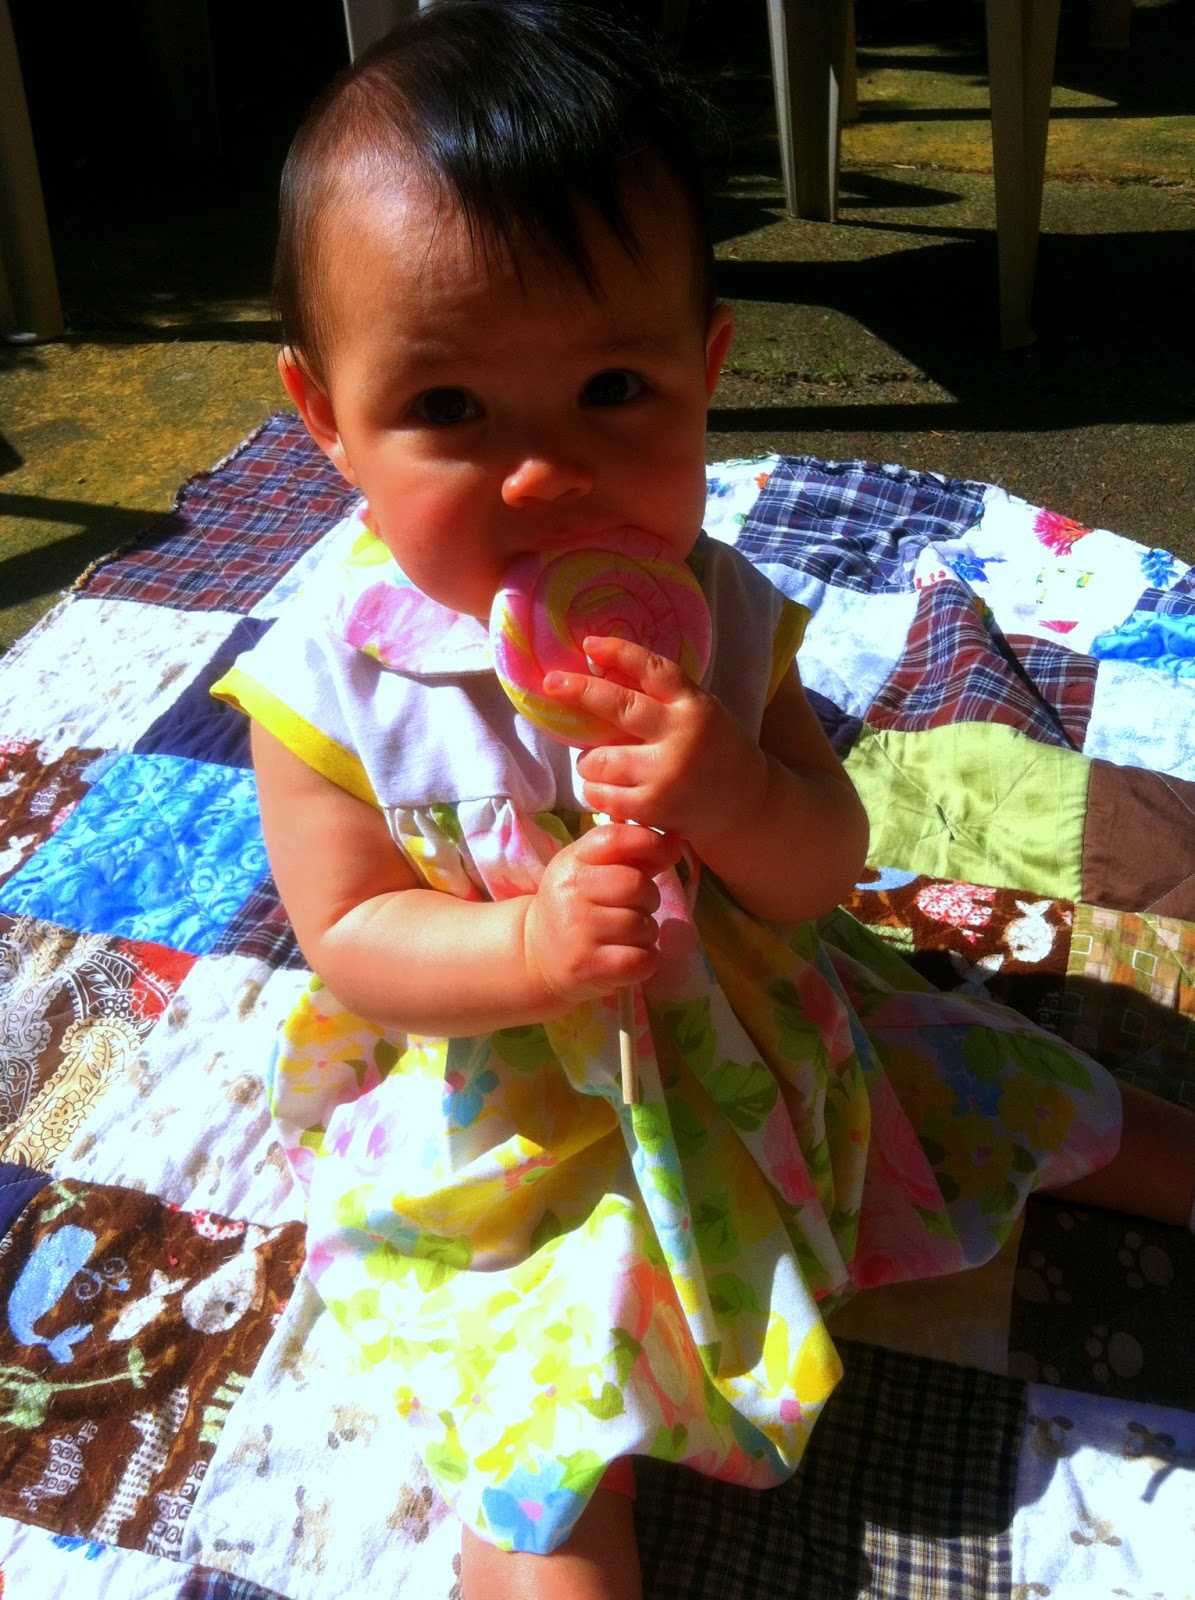
I wouldn't know obviously.  The day before (I thought) Easter I decided baby girl absolutely must have a cute little dress made by her mama.  The fact that I scored a bunch of vintage little girls patterns in just about her exact size really sealed the deal though.  I rushed all day Saturday to get this dress done and was on track when I was informed that Easter was actually the following Sunday.  Derp.  So I took my time, hand stitched down the hem and the lining (on the bus on the way to work!), and finished it punctually enough the day before Easter.  Was it worth it?  Not really.  She couldn't crawl effectively and she ruined the entire outfit (and her shoes) trying to eat lots of candy and crawl around on the patio.  Am I a better mother for this?  Doubtful.  Does she care at all about cute little dresses?  No, she'd much rather roam naked and wild and free.


But I can look back on these pictures in a few decades and gush because: soooooo much cuteness!!!  So maybe it was worth it after all...

Tuesday, March 19, 2013

Chevron Skirt

My first experiment in stripe matching has turned out to be a success.  Check out my perfect chevrons =)


Please ignore the fact that my black slip is so blatantly hanging out.  I really must make myself a white slip.  Actually, I still haven't shown off my black slip.  I've developed a bit of a backlog of projects to be blogged. Fortunately (?) the neverending quilt of doom 2 is fixing that.  By the time I finish it I expect this blog (and the world as we know it) will have shriveled up and died.  Victims of entropy the lot of us.


I used the same basic pattern I used for my last two skirts...  Except I cut each piece out flat instead of on the fold so there are four main pieces.  I left off the pockets for fear of next level stripe matching, which means I all four pieces are the same!  I'd like to add patch pockets, but this skirt is already seeing pretty frequent wear so it's hard to say when/if I'll ever get around to it.


I think the bias flows pretty nicely.  I like it.  I could technically wear it with the chevron pointing up or down because, hey, one pattern piece!  It's probably worth mentioning that the waistband is elastic (and, ahrm, handstitched).  I wasn't sure how topstitching and zippers and stuff would work with the drape of the bias.     


The fabric was a sheet at Goodwill that was just too cutesy to pass up for $2.  It's mostly purple and pink with some sparkle.  I bought it thinking baby clothes but I obviously got distracted ;)


The colors are a little less pronounced IRL.  I just wanted you to see my awesome stripe matching.  I cheated when I cut the pieces out.  Since this fabric is the same on both sides I just cut one piece using the pattern and for the other three I just used that piece as my pattern.  That way it was really easy to see if the stripes lined up.


Those lines are from the iron-on seam binding I applied then removed.  It was too stiff and the bias cut fabric was all wrinkly along it.  The vintage seam binding from the thrift was a lot softer and drapier than this stuff I bought at the LFS.  Win some, lose some I suppose.   I've heard fabric cut on the bias doesn't unravel...  I guess I'll find out!

Fabric: less than half of a $2 sheet, so $1
Notions: Almost $3 worth of (wasted) seam binding and about $1 worth of elastic

Total cost: $5

Running total: $8.20

Final thought: Seam binding may or may not be worth the money =(  but three skirts for less than $9 is working for me.

Saturday, March 16, 2013

I use all the parts.


Lots of top sheets, if not most, have some sort of decorative element along one edge.  A contrast color or print or an interesting hem.  The purple sheet I used for my collared darling ranges dress had these neat little pintucks (or are they pleats?  I really do not know) along the top edge.  There was more than enough after making that dress to squeeze out this skirt. and also some (non-bias) quilt binding.


I just used my TNT (isn't it exciting?  I have some tried 'n true patterns finally) A-line skirt pattern which I frankendrafted.  I'll leave that one up to your imagination.  The tucks point upward so they can look a little funny at the end of the day if I don't sit on them just right.  But all in all I'm really happy with the skirt.  So happy, in fact, that I've already apparently ruined it.  There's a great big stain on the front of it.  I'll be scouring Pinterest this weekend for remedies.


Luckily I had this light purple zip in my stash. One of the many I picked up at the thrift shop in $1 baggies with 10 or so to a bag.  The material, obviously, was leftovers.  The thread is one of several spools that have been floating around with the sewing machine since I can remember.  As far as I can tell, that makes this skirt approximately 10 cents.


Oh, wait.  $1 worth of avocado green seam binding which also came from the thrift.  This skirt was originally meant to be a muslin of this skirt pattern so I didn't bother finishing the seams...  Then I liked it so well I decided to try this stuff out as an afterthought.  It must be cheating, it's so fast and easy!  It's somewhat vomitous but I love the way these colors look together.

Total cost: $1.10

I think I might start keeping a running tally of how much each of my projects costs.  Then see how much I've spent on my wardrobe in one year.  Might as well start here, eh?


Thursday, March 14, 2013

Thrifty Thursdays; the First

For the time being I work ten minutes from Goodwill...  Which means I go there two or three times a week to see what's on sale.

Two of the things from the last couple of weeks that I'm excited about but have not yet cut into:


The floral on the bottom is a poly cotton blend queen size sheet, destined to become a summer frock.  Actually destined to become a muslin of sorts for a new pattern I picked up a couple of weeks ago at the fabric store.

The dark purple on top is a boucle of unknown fiber content that cries out to be a real live grown-up coat.  When it's destiny shall become fulfilled, however, I cannot say.  I'm not quite up to real clothes like jackets and pants yet.

Tuesday, March 5, 2013

School girl top

Disappointment (noun):

Attempting to make a sophisticated bow tie blouse top a la Winnie of  Scruffy Badger and ending up with something more like a crappy version of Sailor Moon's school girl shirt.


Inspired by Scruffy Badger's excessive number of bow tie blouse patterns I decided I wanted one of my own.  But, you know, I really can't be arsed to buy a new pattern and make a toile and all that so I just modified the Darling Ranges pattern to extend to become a shirt and added on a tie.  So what went' so wrong? 

In a word:  Everything.


First of all this fabric is super slippery and I sewed the bust darts all messed up.  How?  When I've made this pattern so many times how did I fuck up so early on in this one?  I don't know.  Then I totally misjudged the length of my torso which landed the vertical darts way too low.  No big deal, right?  Just get out the seam ripper and fix it.  But when you use the pink chalk that doesn't wash off on the wrong-side-turned-right-side of your fabric it becomes a big deal.

That's all I'm even going to bother to say about this shirt other than this:  It looks better under a blazer.


Sunday, February 17, 2013

purple pantomime

Nothing about this involves a pantomime.  It's just a word I enjoy and I thought you would, too.  You're welcome.


I could lie and pretend like this is a different pattern, but would you believe me?  This is, in fact, yet another rendition of the Darling Ranges pattern.  What can I say?  I'm stuck.  It's a nice basic pattern that is easily adaptable.  As you can see this time I've taken it up a notch and added a collar.


I still haven't looked into the swayback adjustment, though.  Nor have I bothered to wash, de-lint, or iron this dress.  My bad.  Let's move on though, shall we?

Yes my legs are really that white.  Welcome to Seattle.
I've gone with an A-line skirt again with pockets (gotta have pockets) and used the collar from   Butterick B5030.  The collar came out... erm... bigger? pointier? than expected.  It's okay though I guess.  I might modify it next time (yes, roll your eyes if you must, but there shall be at least one more of these).

This is my pensive face.  Thinking of all the darlings to come...

One thing I didn't do but I wish I had is interface the button bands.  I did that on my last rendition which you actually haven't seen yet (yes there's another one!) and it really makes a huge difference.  The material is heavy enough I didn't think it needed it but I'm adult enough to admit when I'm wrong.

I suppose a good blogger would've ironed out the most obvious wrinkles first.

The Reader's Digest Complete Guide to Sewing is one of the few sewing books I have (for realz guys I've got 3 all together!) and I've been working on reading through it.  It's a big book, so it's quite the endeavor.  I used all the info it had on rolled collars, though, and I'm glad I did.  It actually recommended stitching the seam allowance just to the under collar, which I considered but obviously didn't do.  I couldn't figure stitching into that crazy point!  I just went for plain old topstitching instead.  Please don't laugh at my wonky stitches; my machine is old, that's the best I can get out of it.

I know I love to see the guts so here ya go.

Guts...  BRAINZZZ....

Check out how cute my pockets are!  I used contrast bias tape to finish the pocket edges and the neckline because, again, too lazy to be arsed with making self bias tape when I had some bias laying about.  The collar is just sewn to the neckline and then everything is finished as usual.  It's a nice, easy, clean finish.  Forget facings!

More guts.

Fabric: thrifted sheet.  I'm hoping to move onto real fabric sometime soon.  Up til now I've felt that my skills were far from doing justice to anything nice, but I'm building up some confidence.
Notions: thrifted buttons from the huge bag o' buttons for 99 cents and some bias tape scraps from other projects.
Pattern: Darling Ranges, as I've mentioned, with a self drafted skirt and pockets, collar from Butterick B5030
Time to Make: I've been working on this dress in spurts since Tuesday!
Make again: Must you ask?

This picture is totally unnecessary but I love it so I had to include it.  All the stitching is black with black buttons to match.  I'll pretend that this was a design element, but I was really just too lazy to go buy matching thread.  I actually ended up liking it.  Now my dress matches my shoes!


All in all, I'm pretty happy with this dress.  It could be a bit better, but it'll do.  Maybe I can do something about the button band later.  Perhaps my sewing book will give me the answer if I keep reading...

Sunday, January 27, 2013

vintage modern darling

I don't recall who said it but blog guilt is a strange beast.  Why do I feel guilty?  To whom exactly do I apologize for blatant blog absenteeism?  Poor light conditions?  General disappointing imperfection?  Redundancy and repetitiveness?

I don't know, so I'll just go ahead and apologize once for my truancy, the light (or lack thereof) in Seattle in January, and the fact that this is yet another rendition of the Darling Ranges dress.

here i am looking incongruously badass on a field of rainbow hearts 
The thing I like about this pattern is that it's simple to alter.  It's just a basic button-up dress without a lot of fuss.  I've used it to make shirts so far but this time I did a full skirt with pockets...  you know, like the kind pants have.


The original pattern has a rectangular gathered skirt (a dirndl I think it's called) with pockets sewn into the side seams.  I only sewed it up like that once for a muslin and decided it wasn't my style so I used the skirt pieces from another pattern and drafted my own pockets (which are finished with bias tape ooh lala so fancy).  I've used that pocket piece on several pairs of pants and skirts and I don't like it.  I like this kind of pocket better.  They stay put and don't bulge out or pull down oddly.


I'll try and do a swayback adjustment on my next one, I'm not diggin' all those wrinkles on the back.


You can't really see the pattern on the other shots so here's a better look.  You can also see my fish mobile (which never got a blog post but fully deserves one) and my little helper.  That's what I'm looking at by the way.

The material was a top sheet from Goodwill.  I do have some nice fabric but I'm in that awkward phase where I'm too chicken to use it.  What if I ruin it!?  I keep telling myself once I get some more practice...


I've modified the pattern pieces so many times it's hard to say what other changes have happened on the bodice.  You can see my awesomesauce pockets though.  Yes!  I did have some weirdness around the neckline and had to turn under the neck edge (after I'd already finished it with bias tape!) and sew it down.  It's all right, but doh!  I don't know why this one time it came out all wonky and gapey.  My computer insists gapey isn't a word but I beg to differ.


I never can get the twirly shots to work but it's twirly!

All in all I'm happy and I will continue to use this pattern to death.  For the price I certainly intend to get my money's worth!  (I'd like to add that this pattern is obviously awesome and worth the money.  That's why I keep using it.  Plus, supporting indie designers instead of the big evil corporate pattern makers.  It's a win-win).  Total cost: $2.75 and there's enough fabric left for a skirt.